Integrated Lights Out Manager ILOM Command line
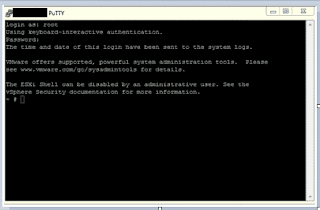
Login with ILOM root password[root@testserver ~]# ssh test-ilom.example.com
Oracle(R) Integrated Lights Out Manager
Version 3.2.8.25 r114493
Copyright (c) 2016, Oracle and/or its affiliates. All rights reserved.
Warning: HTTPS certificate is set to factory default.
Hostname: test-ilom
Below targets are available to check in console. Once you run ls command, will get the property information of hardware. In that property we can get ILOM IP address, MAC ID, Server Model, Serial No & Operating system detail as well.
-> ls
/System
Targets:
Open_Problems (0)
Processors
Memory
Power
Cooling
Storage
Networking
PCI_Devices
Firmware
BIOS
Log
Properties:
health = OK
health_details = -
open_problems_count = 0
type = Rack Mount
system_fw_version = 3.2.8.25
locator_indicator = Off
power_state = On
actual_power_consumption = 305 watts
action = (none)
a. To check power supply status
-> cd /System/power
/System/Power
-> show
/System/Power
Targets:
Power_Supplies
Properties:
health = OK
health_details = -
actual_power_consumption = 383 watts
max_permitted_power = 788 watts
installed_power_supplies = 2
max_power_supplies = 2
->
Login as root & run ipmitool command.
[root@test-ilom~]# ipmitool sunoem cli
Connected. Use ^D to exit.
-> show -l all /System/Power/Power_Supplies location health -t
Target | Property | Value
-------------------+-----------------------+-----------------------------------
/System/Power/ | health | OK
Power_Supplies/ | |
Power_Supply_0 | |
/System/Power/ | location | PS0 (Power Supply 0)
Power_Supplies/ | |
Power_Supply_0 | |
/System/Power/ | health | OK
Power_Supplies/ | |
Power_Supply_1 | |
/System/Power/ | location | PS1 (Power Supply 1)
Power_Supplies/ | |
Power_Supply_1 |
b. To check Processors status
-> cd Processors
/System/Processors
-> show
/System/Processors
Targets:
CPUs
Properties:
health = OK
health_details = -
architecture = x86 64-bit
summary_description = Two Intel Xeon Processor E5 Series
installed_cpus = 2
max_cpus = 2
c. To check BIOS version
-> cd BIOS
/System/BIOS
-> show
/System/BIOS
Targets:
Config
Properties:
system_bios_version = 17120100
boot_mode = Legacy
reset_to_defaults = none